Emoji Love
Spirit Week!
The schools always pick these crazy themes for spirit week. This year we got Emoji day!
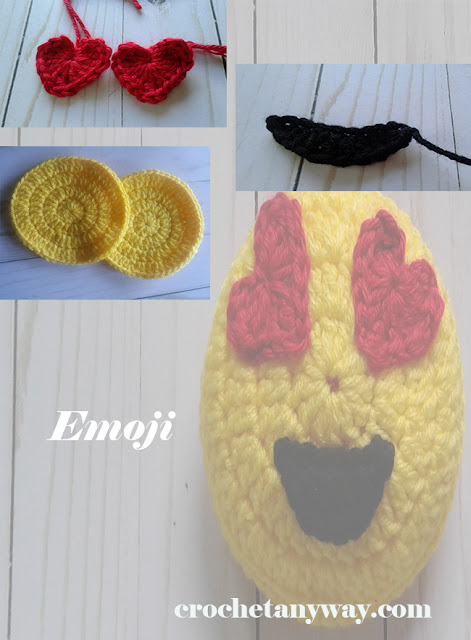
I decided to make a couple of emoji braclets for my daughter to wear. The little bracelets didn't turn out to great but she wore them anyway. A bit later, I thought I should've made a headband. So I had this idea to make an emoji and put it on a headband. I decided to make this little emoji pillow. I had originally thought to make it as part of a headband. However, the size was a bit bigger than she would have worn. I think this little crochet pillow is easy enough for a beginner in crochet.
Materials:
Red Heart Supersaver in Bright Yellow or Daffodil and a small amount of black and Caron simply soft in Autumn red
or whichever color you prefer
Hook 5.00MM
Hook 4.00 MM for the eyes
or whichever color you prefer
Hook 5.00MM
Hook 4.00 MM for the eyes
Hook 4.00 MM for the eyes
To check if you have the correct hook for the pattern, here is a crochet hook conversion tool for you.
This post contains affiliate links for which I may make a small commission with no extra cost to you should decide to purchase. This just helps to keep this blog going. Thanks for your support. Full disclosure and privacy policy here.
Pattern:
Stitches:
hdc = half double crochet
dc = double crochet
tr = triple crochet
Make 2 Circles
Round 1: Ch 3 (counts as first dc) Make 11 dc in the magic circle (12)
Round 2: Ch 3, 2 dc in each dc (24 dc)
Round 3: Ch 3, 2 dc in the next dc, 1 dc in the next dc, continue around (36)
Round 4: Ch 3, dc in same st, dc, 2 dc in next, dc, 2 dc in next, continue around (54)
Heart Eyes in the Red Caron Simply Soft Change hook to 4.00MM-
Make a magic circle. Chain 3 in magic circle, tr, tr, tr, dc, dc, dc, ch 1, tr, ch 1, dc, dc, dc, tr, tr, tr, ch 3 then slip st into magic circle and pull tight. Leave a long tail for weaving onto the yellow circle.
Make another one exactly the same as the above.
For the mouth use the black yarn and switch back to the 5.00MM hook
ch 9
hdc in next
2 dc in next
2 dc in next
hdc
hdc
hdc in next
sl st the last st
Leave a long tail to stitch it into place.
Leave a long tail to stitch it into place.
Sew the heart eyes in place and the mouth beneath them. Then stitch the two circles nearly together. Stuff with a bit of fiberfill and finish stitching up the pillow.
If you have any questions, please leave me a comment. Please consider subscribing to my blog, so you can get updates in your email when I post a new pattern on my website or check out my facebook page.
For more free patterns go to https://www.crochetanyway.com/p/free-patterns.html
Check here for Premium patterns
Or check my ravelry store
There are patterns and printables in my Etsy store
https://www.pinterest.com/crochetlife2/
https://www.instagram.com/crochetanyway/
This post contains affiliate links for which I may make a small commission with no extra cost to you should decide to purchase. This just helps to keep this blog going. Thanks for your support. Full disclosure and privacy policy here.


Comments
Post a Comment
Drop me a line. I would love to hear from you.